8400K Digital Optical Micrometer
8400K Certified Optical Micrometer Kit
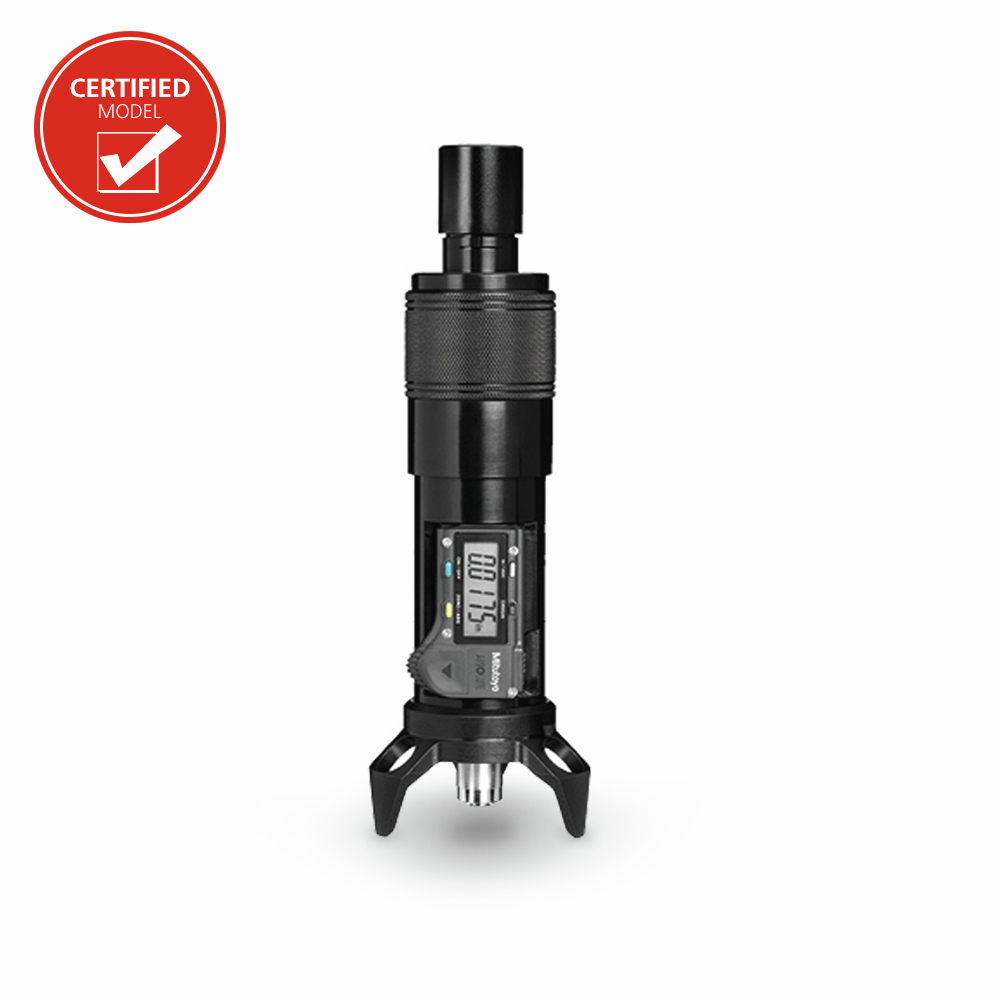
- 8400K Optical Depth Micrometer Kit
- Comes with ISO Calibration Certificate
Select your Model
Enter a value between 1 and 100000000 in increments of 1.
excl. taxes & shipping cost
- Hand-held microscope and optical depth gauge
- Uses a manual focus method to measure surface indentations and protrusions
- Primarily used for measuring damage on critical aircraft surfaces to determine severity, repairability, and airworthiness
- For use on flat and curved surfaces
- Inspect metals, natural and synthetic polymers, composites, painted or chemically treated finishes, fibers, and transparent materials
- The Digital Depth Optical Micrometer measures:
- Scratches, corrosion pits, dings, impact dents, and other surface damage
- The depth of engraving, etching and other part markings
- Transparencies for overall thickness, and the depth and thickness of crazing and fractures, and imbedded bubbles or seeds
- The height of burrs, chips and small surface protrusions
- Can verify dimensions for compliance to drawings or other specifications
- It also includes 3 interchangeable bases, 2 black and 1 clear
- A 3-Leg tripod base used for most flat and simple curved surfaces.
- A 4-Leg base used on broad convex and concave surfaces.
- A new and improved acrylic V-block base for leading edges, small diameters, outside angles, and flat surfaces next to an edge.
- The Optical Micrometer can easily be connected to a laptop or tablet by swapping the eyepiece with a microscope camera. Annotations of the depth and other notes can easily be made to the images to produce detailed inspection reports. The image quality is excellent; the camera captures every detail and records exactly what would be seen by looking through the eyepiece (Included in 15500 kit only).
| Technical Data Chart | |||||||||||||||||||||||||||||||||||||||||||||||||||||
|---|---|---|---|---|---|---|---|---|---|---|---|---|---|---|---|---|---|---|---|---|---|---|---|---|---|---|---|---|---|---|---|---|---|---|---|---|---|---|---|---|---|---|---|---|---|---|---|---|---|---|---|---|---|
| Data |
| ||||||||||||||||||||||||||||||||||||||||||||||||||||
- Optical Depth Micrometer
- 3-Leg Micrometer Base
- 4-Leg Micrometer Base
- Acrylic V-Block Micrometer Base
- 10X Eyepiece
- 20X Eyepiece
- 10X Objective Lens
- 4X Objective Lens
- LED Flashlight
- Scratch Sample Plate
- Foam Lined Carrying Case
- Certificate of Conformance (COC)
- ISO Calibration Certificate
Manuals
- 8400K-Digital-Optical-Micrometer-Manual.pdf
8400K-Digital-Optical-Micrometer-Manual.pdf
Basic Principle
The Micrometer uses focus to measure the distance between two points on different surfaces (at different heights). Features at the same depth will appear in focus and features above or below will be blurry. Turning the Focus Adjust moves the focus up and down.
Procedure
- Fine position the Micrometer so the edge of the recessed area, like a scratch, is in the center of the field of view.
- Focus on the top surface directly next to the scratch
- When the surface area is in sharpest focus, press the ZERO/ABS button on the Digital Display to set a starting point for the measurement.
- Without moving the Micrometer, focus down to the bottom of the damage. To find the true lowest point, focus down passed what seems to be the last area in focus until nothing else appears in focus below, then come back up to the first area that comes into sharp focus.
- Record the measurement from the Digital Display.
- Verify the measurement by refocusing up to the top surface. The Digital Display should show "0.0000“ again.
The entire measurement cycle should be completed by the same person. When switching users, always reset zero or the result may be inaccurate. The Micrometer does not have prismatic correction, the view through the eyepiece is inverted.
Calibration Procedure - Recommended Yearly
Equipment needed: 4x Rectangular Gauge Block (0.005”-0.200”), Grade 0, ASME B89.1.9, calibrated and traceable to NIST. Recommend Sizes: 0.005”, 0.015”, 0.0625”, 0.100”
- Wring 0.005” and 0.100” gage blocks by sliding one block perpendicularly across the top of the other, then rotate lengthwise and slide to create a step with the 0.100” gage block on the bottom.
- Place micrometer over the step and position so approximately one‐half of the field of view is on the upper block.
- Focus on the top surface of the upper block. Zero “0.0000” digital display.
- Focus on lower block. Read display; if equipment is functioning properly the display will show the exact thickness of upper block.
- Repeat steps 1-5, using the 0.015” and 0.0625” as the upper block.
Ready to tighten up your depth measurements with this micrometer? Click here to learn how traditional depth gauges work, how to apply them alongside optical tools, and what to watch for to maintain accuracy.

8400K Optical Micrometer Kit
Article No: 12166